All posts by AGS Content Team

cannabis potten

The 3 Best Cannabis Pots

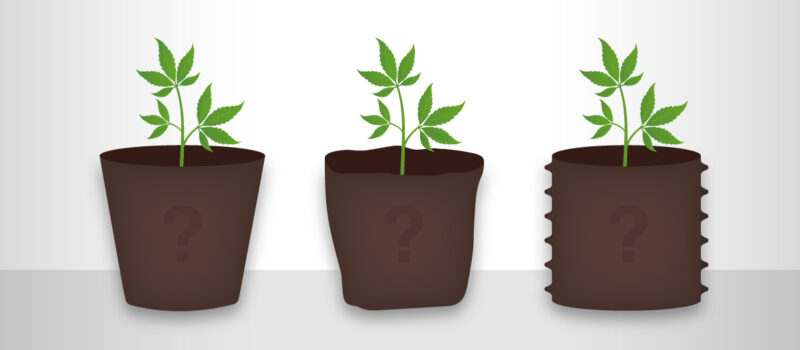
Choosing the right cannabis pots for your weed plants can have a great impact on the yield. There are various types of pots and size also matters. Are you going for plastic, textile or air pots? Every different kind of pot has its own pros and cons. In this blog we will give you an overview of the 3 best pots for weed plants and we’ll tell you how you can make the best choice.

Finding The Best Cannabis Pots

When you want your weed plants to grow in pots, it’s important to realize that the pot itself has a big influence on the way your plants will develop. The root system is developing in the pot and the roots are simply the base of a healthy weed plant. Both plastic and textile cannabis pots, or special air pots, have their own pros and cons. Read more about the properties of these different kinds of cannabis pots below!
beste weer cannabis wietzaadjes
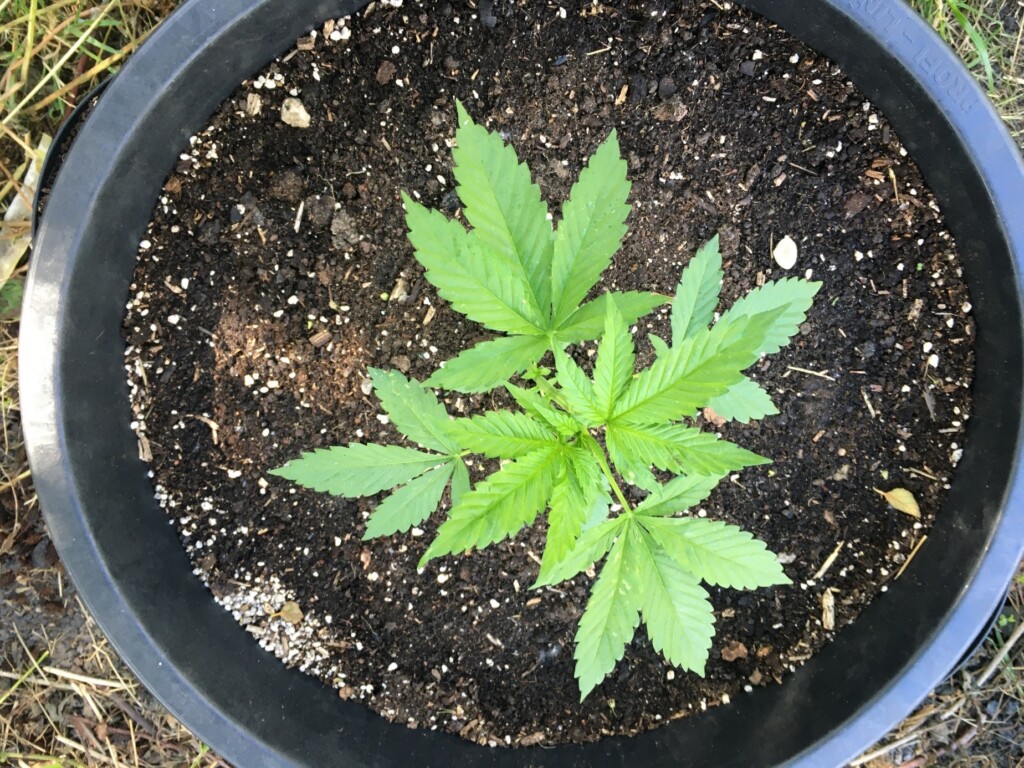
Plastic flower pots: cheap and practical.

What All Cannabis Pots Should Offer

Even though a grower can choose various types of cannabis pots, every pot should meet some basic requirements. Essentially, every pot is a ‘container’ for your weed plant. The most important thing is that the soil (your carefully balanced soil mix or another growing medium) is firmly contained, providing a stable and safe growing environment.

An important exception is outdoor growing in open soil, because in that case you obviously won’t need pots. We’ll skip working with hydroponics too: even though every hydro plant is growing in its own ‘little pot’, the medium is water instead of soil, so the tips in this blog don’t really apply.

Cannabis pots should be solid, because you don’t want the pressure of the expanding root ball to break the pot and above all you want to protect the fragile roots very well. Furthermore, the soil contains the essential organic soil life the roots need so badly to be able to absorb water and nutrients.

Next, the pot needs to be big enough to give the roots plenty of room to grow. This is the main reason it’s important to transplant your crops from time to time. Transplanting is a great opportunity to add some fresh soil or compost, because weed seeds need a lot of time, space, water and nutrients to grow into an adult plant that’s ready to be harvested.

Another important aspect is drainage. Always make sure that the water you feed your weed plants can be discharged. You can do this by drilling small holes into the bottom of the pot. Some cannabis plants are specially designed to drain and ventilate, so most regular flowerpots are already equipped with holes. Don’t forget to check this before you start though, because the last thing you want is a molded and rotten root ball, which slowly kills your plant.
growing weed seeds roil roots
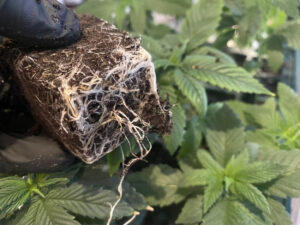
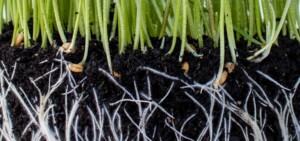
You can’t see it, but on the bottom of the pot stuff is happening…

Three Types Of Cannabis Pots

The most used pots for weed plants are the regular plastic flowering pots you can find in your typical garden center. Another very common thing is earthenware pots. There are also specialist pots made of textile and advanced ‘air pots’ with bigger openings. We’ll give you an overview of the different kinds of cannabis pots and their pros and cons.

Plastic And Ceramic Pots

You can buy plastic pots everywhere, so as a novice grower that’s the most logical choice. They are very affordable, available in many different sizes and easy to work with. When you’re growing more than one plant, it’s useful to buy square cannabis pots. You can put them closely together, so you can use the available space efficiently. This is especially practical with an indoor grow in a small grow tent or grow room, but also outside in a small garden or greenhouse.

The advantages of plastic pots are pretty obvious. Unfortunately, there are also some disadvantages. The roots of weed plants that grow in plastic pots will keep on growing, until there’s not enough space anymore. The roots huddle together on the bottom of the pot and can eventually smother each other. Sometimes water is left standing in the pot, which causes the roots to rot. So, it’s very important to repot your plants on time. You can see it’s time when the roots are visible through the holes in the bottom of the pot.
ceramic cannabis pots
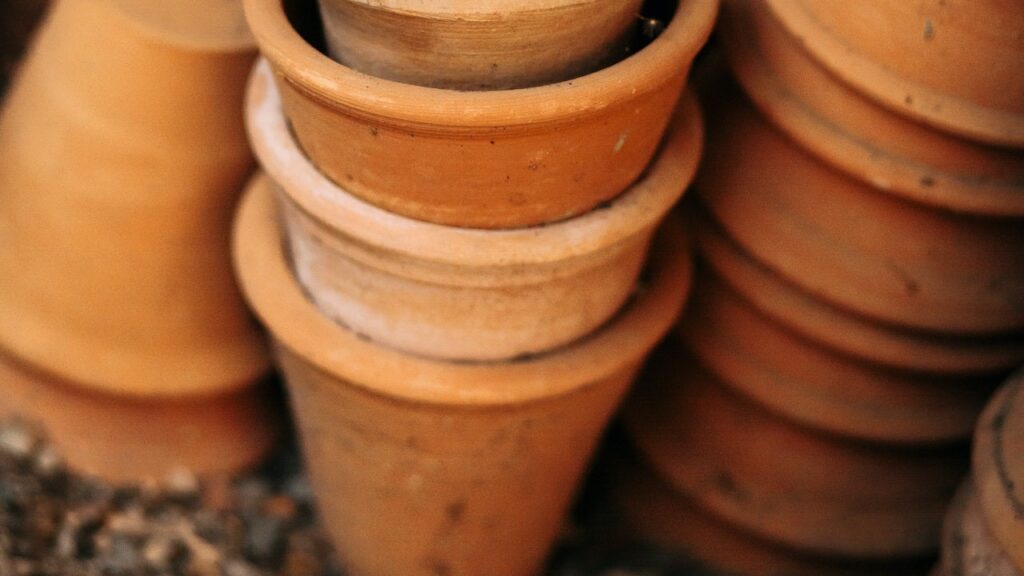
Ceramic offers a better protection against external influences, but is heavy and fragile.

Ceramic cannabis pots are similar to plastic flowering pots. However, the temperature regulation of ceramic pots is way better than the plastic ones. In bright sunlight they provide more protection to an outdoor grow. On the other hand, they drain water less efficiently and they are more fragile and heavy. This makes the pots more inconvenient and a little less suitable for growing weed plants.

Fabric Cannabis Pots

Tex犀利士
tile or fabric pots are very popular for growing cannabis. These lightweight cannabis pots provide a lot of ventilation, which is very much appreciated by the roots of cannabis plants. The bacteria in the soil get a lot of oxygen, so your plants can absorb more water and nutrients.

Another advantage of fabric cannabis pots is that the roots, when they keep on growing, won’t bump into a plastic wall, but against air. When that happens, the tip of the root will dry out and dies. The roots basically prune themselves and we call this ‘air trimming’. This stimulates the roots to spread more evenly throughout the pot and prevents them from getting tangled up or ‘rootbound’.

Furthermore, the ventilation in the pot prevents the soil from getting too moist, so the chance of rot gets diminished. However, the soil does dry out quicker, so you have to water your plants more frequently. Textile pots are definitely a good option for growing weed plants, because of all these advantages.

cannabis pots textile
Textile has an open structure, which provides more air and space to your roots.

Air pots

Air pots are relatively new. They are plastic pots with holes in the sides. This means that these cannabis pots also offer the advantage of air trimming, just like textile pots, and help to prevent a lack of space for the roots. Using air pots is very attractive: plants grow very well in them and there’s a lot less chance of rotten and molded roots.

The only thing is that you can’t use normal soil in air pots. When you water the plants, more and more canals form, which makes it very hard to moisturize the soil evenly. You can choose to use coconut fiber in the pots. This is a light medium and ensures a good drainage.

The disadvantages of these pots is that the soil dries out quickly, so you’ll have to water the plants more often. Air pots are more expensive than both plastic and textile pots. But, when you can afford them, air pots may be the best choice for weed plants.
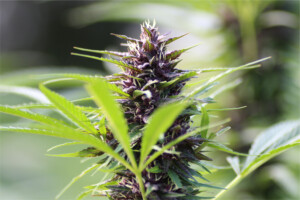
flowering pots weed plants
Pretty flowers deserve a pretty pot!

Different Cannabis Pots For Indoor And Outdoor Grows?

Now, maybe you’re wondering which types of cannabis pots are the most suitable for growing weed seeds outside, or rather inside. Generally you can use all pots both inside and outside. For an outside grow, plastic, textile and air pots are good options. However, you could also go for terracotta pots. They are heavy though, so difficult to move. But especially when temperatures rise extremely, terracotta can regulate the temperature in the pot very well. And that can be an important advantage.

For an indoor grow you can also use the three pots we mentioned above. You now know the pros and cons. All three types of pots an also be used in a grow tent.

How Big Should Cannabis Pots Be?

Obviously, the size of the cannabis pots also matter. Choosing the right pot size is the first step towards a successful yield. Now that you know the advantages and disadvantages of plastic, textile and air pots, it’s time to choose the right pot size. The size determines the amount of space for the roots.

After germination, the weed plant starts as a little seedling (from seeds or cutting) that makes its first taproot. From here on, the small plant develops little roots that grow bigger and bigger until a beautiful network of roots has developed, which makes sure the plant above ground can grow healthy and strong. Without this strong root system the plant can’t grow very well during the vegetative phase. And what do the roots need? First of all they need space. As you’ve read before, a lack of room causes the roots to entangle and smother each other. This can lead to a shortage of nutrients and a smaller yield.
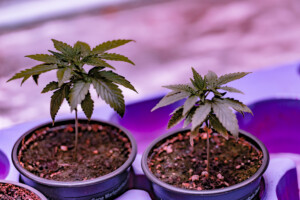
pot size weed seeds

Choosing the right pot size can make all the difference. You can use these guidelines:

Put a seedling into an small pot of 0.5 liter. After a couple of weeks you’ll start to see the roots growing from of the bottom of the pot. This is the moment they will need a bigger pot. Generally this takes around 4 weeks. Your little plant is ready to be transplanted a pot of 6 to 8 liters. The plant can start growing now. 1 week before the plant starts to flower you can always repot again. These pots should be 18 to 25 liters. This way, the plants get enough time to adjust to their new pot, after which they will start flowering and hopefully grow beautiful buds.

Cannabis Pots For All Weed Seeds And Plants

Like you can see, choosing the right type of cannabis pot totally depends on your own preferences, budget and grow technique. Fortunately, our web shop provides every first class weed seeds you could wish for, so we’re sure you’ll find the right pot to go with them!

Order The Best Seeds For Every Pot

Do you want to learn more about the best way to let your weed seeds grow and flower? Our blogs provide more detailed information about important techniques, weed strains and the grow materials you need for indoor or outdoor grows!

duurzaam cannabis growen

Sustainable Cannabis Growing: 4 Steps

Do you ever worry about the negative impact of growing cannabis on the environment? Or about the high energy costs that come with it? Cannabis is a plant that needs lots of heat, water and nutrition. Therefore it’s smart to keep track of the sustainability of your growing technique. Growing cannabis in a sustainable way isn’t just better for the environment, it’s also good for your wallet!

Sustainable Cannabis Growing: Indoors & Outdoors

First of all we want to answer a question that will rise in many people: is it really necessary to grow cannabis in a sustainable way? Are those couple of plants in your garden or grow room really that bad for the environment? Unfortunately we can’t deny that your weed plants can have a considerable ecological footprint. Especially when you grow indoors, that negative impact definitely exists. But also with an outdoor grow higher efficiency can be achieved.

You probably use energy-consuming grow lamps and several fans. Furthermore, you’ll use nutrition and (maybe) pesticides. All of this will affect the environment in a negative way.

Why Try Sustainable Cannabis Growing?

You might say that us growers have, or should have, a moral obligation to be nice to the environment. Despite all the efforts of growers and all the hybrid strains we can use nowadays, we owe all these wonderful cannabis genetics to Mother Nature. So it’s only fair to give something back to her, by trying to grow your cannabis in a sustainable way!

If this isn’t reason enough for you to start to alter your growing technique, then do it for your wallet. Energy costs are rising significantly and every bit you can do to save power, is certainly worth your while.

The sustainable saving tips we’ll give you in this blog aren’t just for growing indoors. Growing cannabis outdoors is generally more environmentally-friendly. At least you don’t need lamps or fans. However, growing outdoors involves a lot of chemical fertilizers and pesticides and that certainly has a negative impact on the environment as well. So, both indoor and outdoor growers can do a lot to make their grows more sustainable. And that doesn’t need to be complicated at all.

outdoor indoor saving costs growing weed

4 Steps To Sustainable Cannabis Growing

Do you want to save energy and have a lower environmental impact while growing cannabis? There are four aspects you can focus on: lighting, climate control, water consumption and waste management.

1.Lighting

Cannabis needs good lighting: the more light the plant gets, the bigger the yield. When growing indoors, you need on average 500 to 800 watts of lighting per square meter. You can imagine when those lamps are on, this is an energy-guzzling activity. Furthermore, the lighting will increase the temperature in the room, so you’ll need ventilation to dissipate the heat. And surely, this kind of equipment also causes your power consumption to rise.

2.Climate control

When growing indoors, besides lighting, you also need to make sure the temperature and humidity are right. Indoor growers typically have a drainage system to dissipate and refresh the warm air. You will also need fans to make the air circulate. Every one of these devices need power, day in, day out.

The grow room’s insulation can also make a big difference when it comes to energy consumption. And since you need the room to be airtight anyway, you might as well make an extra effort while you’re at it and improve the insulation before you start your grow!

sustainable cannabis growing

3.Water consumption

Cannabis is a thirsty plant. Research has shown that a single plant growing in California (indoors or in a greenhouse) between June and October, averagely needs 22 litres of water per day. Of course you can’t entirely compare this with growing a plant for personal use, which will need less water. But it may be clear that growing cannabis involves a lot of water.

4.Waste management

Whether you are growing cannabis indoors or outdoors, you’ll end up with both organic and non-organic waste. When you’re disposing this waste, it’s important to keep the environment in mind. Don’t just throw out your pots when you can reuse them.

Try to separate all the waste and remember that your plant waste is actually ‘green gold’: it’s the (free!) base for a fantastic compost you can use for your next sustainable grow. Also keep the roots, they can be very useful for many different purposes. Can it get more circular?

The Best Tips For Sustainable Cannabis Growing

Do you want to take steps to improve the sustainability of your cannabis grows? And, if possible, even cheaper? We’ll give you our best tips that can help you make the switch to sustainable cannabis growing.

weed growing eco-conscious

1.Save Water

The best way to reduce water use, is by collecting rain water to water your plants. You could also switch to hydroponics or aeroponics. Many people think these methods use way more water, but that’s actually not the case at all.

When growing indoors or outdoors, it’s important to choose a soil that can hold water. Mix perlite and vermiculite through the soil to improve water retention.  Do you grow outdoors, water your plants in the evenings. This will help to prevent the evaporation of the water during the day.

When your plants are 4 weeks old, water them twice a week and make sure you give them plenty of water, so you stimulate them to develop a strong and deep root system.

2.Take Care Of The Soil And The Use Of Pesticides

Do you want to grow cannabis in a sustainable way, take a good look at the soil your plants grow in. Go for organic super soil, which you can make yourself. It contains natural organic components, like perlite, fish bone meal, guano and worm castings.

You can also fertilize your plants in an organic way, with compost tea or homemade compost, using your old cutting waste. Or order one of the many organic nutrition products and make sustainable cannabis growing easy

sustainable cannabis growing

It´s not that difficult to make your own compost to complete your organic cannabis growing methods. Make it easy on yourself by choosing coconut fibre. This is one of the most sustainable methods when growing cannabis and these fibres are a natural by-product.

Obviously, the use of pesticides is terrible for the environment. You don’t really need to use them, you can tackle pests in a more environmentally-friendly way. You will start to notice that the natural soil life will only improve this way. Snails and aphid for example, can be managed, by using their natural enemies and some nature knowledge.

Use neem oil or make your own pesticide with natural soap, vegetable oil and water, or use garlic as a base. Also companion planting can help to protect your plants from pests.

3.Air And Air Flow

Depending on the size of your grow room, you’ll need at least one ventilator to ensure a good air circulation. In a small space one single fan might be enough. In larger rooms you’ll need several. Put them in strategic places, so all the plants can enjoy the fresh air flow.

Use passive intake systems to draw in fresh air. This way, you don’t need active fans that use electricity. This is generally enough for home breeding, since the grow rooms are usually small enough to manage without electric air inlets, adding yet another piece of sustainable cannabis growing to your personal appoaoch.

how to grow best weed

4.Artificial Or Natural Light

If you want to start to grow cannabis in a green and sustainable way, you want to get as many natural daylight into your growing room. Whether that’s possible, obviously depends heavily on your housing situation and the season.

Try to put your plants in a spot where they can catch as much natural light as possible. During wintertime this may only be a few hours and after sunset you can use artificial light. In summer you can use day light continuously. All in all, a significant saving of energy can be achieved.

Tips to use natural light to the max:

  • Put your seedlings and cuttings, after germination, in the windowsill. Keep in mind that very young plants prefer indirect sunlight.
  • Give your plants a sunny place outside.
  • Does your grow room have big windows that allow sunlight to come in? Take a profit! Only turn the lights on after sunset.

5.Use Green Power

If it’s possible to switch to green power, that’s a great way to make your sustainable cannabis growing a bit greener still. This way you can reduce the carbon footprint of your grow. If you have the possibility, check if you can generate green electricity yourself, for example with solar panels or wind energy.

sustainable cannabis growing order seeds

Sustainable Cannabis Growing With Seeds From Amsterdam Genetics

As you can see, there’s a lot you can do to minimize the negative impact on the environment when growing weed. Sustainable cannabis growing isn’t complicated and with a few minor steps you can come a long way. Every tiny bit helps, both for the environment as for your own financial situation. Besides, organically grown cannabis tastes and smells way better!

Many steps in this blog can be applied to both indoor and outdoor grows, by any grower and with every strain. But as a last suggestion for sustainable cannabis growing, we would like to emphasize that it always pays to order high-quality seeds. The yield you get from all your (environmental and electricity) investments is bigger when you use a better strain, so that’s another step towards sustainable cannabis growing.

Start Your Sustainable Grow Here

No matter which seeds you order, with Amsterdam Genetics you can count on the best green yield from all your green sustainable cannabis growing adventures. So, choose your favorite strain right now and start going green today!

cannabis knippen trimmen

Trimming Cannabis: Wet Or Dry?

Finally your plants are fully grown and it’s time to start harvesting! The time is ripe to prepare your beautiful buds for consumption. Is it really necessary to trim your buds and what’s the best way to do this? In this blog we’ll tell you everything there is to know about trimming your cannabis buds!

What Is Trimming And Why Would You Trim Your Cannabis Buds?

When you are trimming your buds, you are trying to remove all the excess plant material, like these little pointy leaves that grow from the buds. These small leaves are called sugar leaves. Cannabis buds are covered in trichomes, which produce cannabinoids and terpenes. Sugar leaves also hold some trichomes, but way less than the buds themselves. Sugar leaves aren´t always visible and some buds contain way more of these leaves than others.

But why would you want to remove them? In the end that’s a choice you have to make for yourself. Here are a couple of reasons to trim your cannabis buds:

  • Less chance of mould and rotting: the more moist and dense the bud is, the bigger the chance that mould and rotting will take over. That’s why it’s very important to dry your cannabis, but you can speed up the drying process when you have already removed the sugar leaves from the buds.
  • Better appearance: trimmed buds look better. In every high end shop you will only see perfectly manicured buds. Many say that nicely trimmed cannabis buds are of higher quality. Although it comes down to taste, the appearance of your buds will probably improve after trimming.
  • Stronger smell: when trimming the buds before storing them in a jar to cure, will ensure that the smell will get stronger over time.
  • Easier on the throat: leaving the sugar leaves on your buds can lead to a ‘harsh’ smoking experience. Trimming the buds makes the cannabis more accessible and easier on the throat when smoking it.
  • Higher concentration THC: even though the sugar leaves contain some THC, the concentration THC in these leaves is way lower than the buds themselves. This means that trimming your buds and cutting away the sugar leaves will leave you with weed with a relatively higher concentration THC.\
cannabis against depression
Well-trimmed buds.

Harvesting Cannabis, Trimming & Pruning: When To Start?

Harvesting is the last part of the life cycle of your cannabis plant. It all started with the germination stage, followed by the vegetative phase and the flowering phase and harvesting will complete the plant’s life cycle. It’s important you don’t get overenthusiastic and start too early, but not too late either!

How can you determine the right moment at which your weed plant is ready to harvest? A grower can see when a plant is nearly ready to harvest, when 75% of the pistils of the flower turned golden brown. Another way, in our opinion the best way to determine the perfect harvest moment, is to take a very close look at the trichomes on the buds. Use a magnifying glass or a macro lens and check the trichomes out. The ratio between transparent, milky white and opaque trichomes is key. Smoking weed that’s been harvested too early will probably only give you a little high, or maybe you won’t even notice any effect. On the flip side, if you wait too long, some of the most important substances of the plant will gradually go to waste. Timing is essential: in this blog you can learn how to determine the ideal moment to start harvesting!

What Equipment Do You Need?

Harvesting is way easier when you use the right tools. You can buy different kinds of pruning shears and other equipment. Read this blog for more information. For trimming your cannabis buds, it’s best to work with small scissors or pliers. With this kind of gear you can reach somewhat inside of the bud, which can be very useful when you’re trying to remove the smaller sugar leaves.

Another nice choice is a curved pruning shear, so you can cut easily around your bud. On the other hand, small scissors with straight blades are often more precise. No matter which tool you prefer, it’s important to always clean your equipment before you start cutting and trimming. Scissors can contain bacteria and mould, which can lead to a disaster if you start trimming your cannabis buds and transfer this time bomb!

Make sure to buy some latex gloves. It’s the best way to ensure a sterile cutting and trimming environment to optimally protect your cannabis. Furthermore, the gloves will prevent the resin from sticking to your hands.

Tip: get a roll of baking paper. You can use this as the perfect surface to lay down the trimmed buds without everything sticking together.

When the trimming part is over, it’s time to give your buds a nice spot to cure. You need to buy some airtight containers to do this. Remember the old-fashioned Weck jar? This is a perfect jar, but an airtight plastic container will also do the job. Finally, take a tray and cover it with baking paper, so you can collect all the excess plant material. Why? Well, why throwing away these leaves, when you can use them to make you own yummy hash or edibles?!

Clipping Cannabis: Dry Or Wet Trimming?

Before you start harvesting, you have to prepare your plant. There’s no such thing as a ‘golden method’ to do this, it comes down to personal preference.

After all, your ultimate goal is to end up with just the buds, so you can start trimming. There are two ways to trim: dry and wet. Decision time!

After you’ve harvested, a grower can choose to dry the buds first and ‘dry trim’ them, or ‘wet trim’ the nugs immediately after harvesting and let them dry afterwards. As always, both ways have pros and cons.

Wet Trimming

Wet trimming is nice and energetic: you’ve been a busy bee during harvest time, so why not start trimming in one go before hanging the plant to dry? Another pro is that you can store more buds in the same drying space. Some growers even think difficult areas are easier to reach when wet trimming, although others seriously disagree – clearly a matter of taste. In any case, mould has less chance of infecting the buds when you trim before drying, because the bud is way less dense which allows moisture to evaporate quicker. The ultimate downside of wet trimming is the resin: the plant is still very wet and the resin is awfully sticky and gooey.

Dry Trimming

Dry trimming has other pros and cons. Trimming the buds after drying gives mould a better chance. Because the buds are so dense, they can get moulded even before you can get started to clip. Also the drying process takes more time. This isn’t just a negative thing, many growers think it is an advantage: you’ll end up with extra compact ‘nugs’.

It’s also said that the taste of a strain is better when the buds dry more gently and evenly. Having said this, all of this doesn’t really matter when mould has taken a grip on your weed, so again it comes down to personal preference and choice. It greatly depends on the quality of your drying area. One thing that can help with outdoor grows: make sure you keep your plants dry in the couple of days before harvest.

Wet Trimming Cannabis Buds: Trim First, Then Dry

Wet trimming means that you start trimming your buds right after you´ve harvested them. It´s called ‘wet’, because the plant isn’t dry yet. This also means the trimming is a very gooey chore to do and the sugar leaves will stick to your hands.

Start harvesting: you can leave the plant in the pot or in the ground. Remove all the bigger leaves. After that, start cutting away the smaller leaves that grow around the buds. This way, you will end up with a ‘bare’ plant, which only holds your precious nugs. Another way to tackle the plant is to cut away branches one by one. Or you can cut the plant down straight away, lay it down and then start cutting away the branches.

Harvest

Harvest your buds. Feel free to leave the buds on the branches, if you think that makes it easier to hold them while trimming. Take a bucket or container and gently put all the branches with buds. Make sure the bucket is clean!

sugar leaves
Never throw away your sugar leaves!

Prepare

Collect all your tools, put on some nice music or ask some of your friends to help you out! Wash and dry your hands carefully. Wearing a pair of latex gloves is not an unnecessary luxury, to protect your hand from the sticky resin. Besides protecting yourself, the gloves also protect your buds by preventing contamination.

Cutting & Trimming

Take your scissors and gently cut all the protruding sugar leaves. Some of them will be hiding a bit further inwards into the bud. Try to cut away as many leaves as possible, without damaging your nugs. It’s impossible to remove all the sugar leaves, but that’s no problem.

Dry & Cure

Your well-trimmed buds need to dry and cure before you can smoke them. Put the branches with buds in a drying rack, preferably in a heated room with a ventilator. If you don’t have a drying rack, you can hang the branches with the buds upside down. Once dried, you can cut the nugs of the branches and put them in an airtight container to cure.

cannabis drogen meer smaak
Dry trimming has its benefits.

Trimming Afterwards: Dry Trimming Cannabis Buds

Dry trimming means you dry the entire plant first before you trim the buds. Cut down the plant as close to the soil as possible. Hang it upside down in a heated area with a rotating fan. When the plant is dry you can start clipping. How do you know the plant is dry enough? Use the top branches as indicator: when they bend they are still too moist, when they snap they are perfectly dry.

Harvest

Cut away all the branches and big leaves, so you’ll end up with just the branches and buds.

Prepare

Make sure your tools are within reach, put on some gloves and some music, or even better: ask some friends to come over!

wietzaadjes bestellen kwaliteit

Want To Start Trimming Your Own Cannabis?

Did this blog inspire you to start trimming your own batch of fresh buds or dried nugs? It’s time to start shopping for the best cannabis seeds first and to start your next grow!

Choose your strain & get cracking!

cannabis compost

Cannabis Compost

Do you already use compost when growing cannabis plants outside? You might think your plants get all the nutrients they need from the soil. And even though that’s basically true, by adding your own home made compost, you can improve the soil, add extra nutrients and get a better harvest. And all of this in a simple and eco-friendly way. Compost converts waste in nutrition. In this blog you can read everything there is to know about making your own compost and how that can help you growing cannabis outside!

The Advantages Of Making Your Own Compost For Cannabis

When growing cannabis outside, you assume that Mother Earth provides your plants everything they need. With their roots in the soil, they absorb the nutrients they need, right? Well, while that’s essentially right, it’s also true that the earth and its soil aren’t inexhaustible sources of nutrition.

If you grow the same plants in your cannabis garden every year, those plants always absorb the same kind of nutrients from the soil. That means that over time the soil gets exhausted. Compost offers the possibility to replenish these nutrients every once in a while. This also improves the structure of the soil (which is great for the roots) and the air circulation of the soil.

dutch duches roots

Compost contains a variety of useful compounds that serve as nutrition for your plants. You can enrich the soil and eventually you will end up with bigger, healthier plants and a better harvest. You can start running to the garden centre right now, to buy a bag of ready-made compost. This is easy and quick, especially when you don’t have that much time. But if you want to think long term, you can start making your own compost. And don’t forget: this compost isn’t just for growing cannabis, you can also use it for potting soil.

Making your own compost has a lot of advantages. It’s not only cheaper than buying it in the garden centre. You also use your own organic waste, from the garden and the kitchen. This makes it eco-friendly as well: you don’t contribute to the growing waste mountain and you give the nutrients back to nature.

More Nutrition For Your Plants

What actually happens when you use compost? When putting your organic waste in a compost bin, microscopically small cleaners get to work. This includes insects, micro-organisms and worms. They degrade grass, apple peel and leftover bread to useful nutrients for your cannabis plants. It’s for a reason that compost is also called ‘The Black Gold’!

aarde compost

When you feed your plants this compost, it will slowly release the nutrients. The advantage of these natural fertilizers is that they never contain too much and they won’t burn your plants, which can happen with chemical fertilizers. Besides this, you also enrich the soil with many micro-organisms that live in the compost. They will keep on doing their work in the soil where your cannabis plants grow.

How To Make Your Own Compost For Cannabis?

You can make your own compost for cannabis by using a compost bin. If you are a handy guy or girl, you can fabricate one yourself, using some old pallets for example. If you don’t want to do this, you could buy one. Remember that bins with a lid can retain moisture more effectively. This has the advantage that the waste degrades quicker.

Place the compost bin in a shadowy spot and preferably directly on the soil. A compost bin has an open bottom, so this way the bin has the best drainage possibilities. At the same time the micro-organisms have easy access to the organic waste. Also make sure to put a small organic waste bin in the kitchen, so you can collect VGF waste at all times.

joshua hoehne FFn2 TW8pxk unsplash

When you collect green waste to make compost, it’s important to ensure the right balance. This creates the right living environment for the bacteria and micro-organisms that will degrade the waste. There are two kinds of waste you can put in the compost bin.

Green waste:

  • Vegetables and fruit
  • Leaves and stalks from your harvested cannabis plants or other plants
  • Cut grass
  • Kitchen waste: potato skins, eggshells, tea bags

Brown waste:

  • Hay or straw
  • Sawdust and wood chips
  • Dead leaves
  • Egg cartons
  • Branches and twigs
  • Carton

The Right Balance Of Cannabis Compost

It’s important to ensure the right balance between these two kinds of waste. Green waste contains a lot of nitrogen and provides nutrition for the micro-organisms. Green waste also brings moisture to the compost. Brown waste on the other hand, absorbs a lot of moisture and makes sure the carbon level increases.

The ideal ratio of the compost is about 25 to 50% green waste and 50 to 75% brown waste. The micro-organisms will do their great work and convert the waste in powerful nutrients for your cannabis plants. This process doesn’t need much attention. If you stir once in a while, you add more oxygen which can speed up the process.

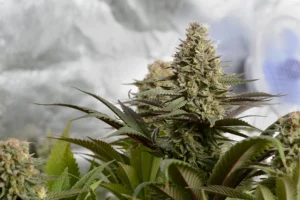
Healthy soil ensures healthy buds! Strain: Magic OG Kush

You do need some patience though. Generally it takes at least 6 months to get your compost ready. But making your own organic compost is really worth it. You can see the positive results reflected in your strong, healthy plants with dense buds.

1
Healthy soil ensures healthy buds! Strain: Magic OG Kush

Resolving Common Problems

When the compost is too wet, the content of your compost bin is moist, sometimes even slimy and the smell is horrific. The reason? Too little oxygen and too much wet material. Put your bin in a dry spot, so the rain can’t get in. Add more dry material and stir the whole thing frequently.

Another common issue is dry compost. In this case the micro-organisms can’t do their job properly and there won’t be any composting at all. Solution? Add more green waste to the compost.

How do you know when your compost is ready to use for a cannabis grow? You can see, feel and smell it. The colour of the content of the bin is dark brow or even black. The material feels soft and is light and fluffy and had a nice and earthy scent. Now you know how to make your own compost using cannabis. You can scatter the compost on top of the soil where your cannabis plants are growing and blooming. Or you mix it with some soil and sow your own cannabis seeds. The compost can be used during every stage of the cannabis grow. Give your lovely cannabis plants the best start in life with your own organic compost!

cannabis nutrition

Cannabis Nutrition For All Grow Stages

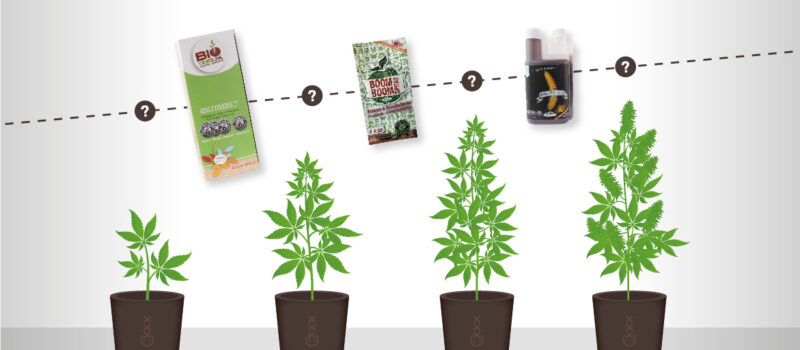
Growers come in all shapes and sizes and the same is true for cannabis nutrition. Whether you choose to minimize intervention and let the plants grow on their own, or go for a well thought-out strategy using specialized fertilizers and boosters, there are many great products out there, suitable for every phase in the life of your cannabis plant. We’ll give you a quick review of all these options, so, when growing weed, you can decide for yourself what your ladies are needing.

For Every Phase The Best Cannabis Nutrition?

Every cannabis plant needs nutrition to grow, to bloom and to develop their full potential. Water and (sun)light are crucial for photosynthesis, but without the proper nutrients the grow just won’t make it to harvest time. Some growers swear by a laissez-fair approach and use a mixture of compost, garden soil and other types of soil for their outdoor grow. This way Mother Nature will ensure a natural and rich soil life outdoors. A strong plant can come a long way with this, but there are many more options to use the right cannabis nutrition and take your grow to new heights!

organic cannabis fertilizers
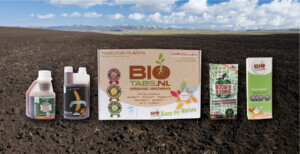
Read this blog about the organic nutrition from BioTabs.

Many growers have their own habits and use regular nutrition for their plants, but wouldn’t it make more sense to choose the right nutrients for every different stage of the grow? Let’s take a look to the possibilities, so you can decide for yourself which choice fits you the best!

Does Germinating Cannabis Need Nutrients?

The cannabis seed provides everything that’s needed for the first step in the life cycle of the plant: germination. So, while it’s theoretically true you don’t need to add anything more that water and kitchen paper, there are some ways to support or speed up the process.

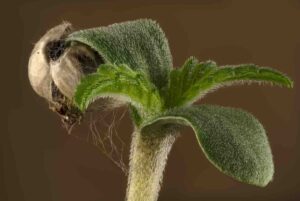
germinating cannabis seedRead our blog about the germination process of cannabis seeds!

If you use a germination accelerator or seedbooster, some special enzymes and other substances enhance the germination rate and help to accelerate the germination process. This way you can give your super seeds the perfect start they deserve. The first phase of your seedling is more likely to be successful in sprouting a strong root and to get a green start while the first cotyledons reach towards the light!

You can buy this kind of cannabis nutrients – that boost the germination process – in a formula that provides everything a young plant could ever wish for. There are also special germination boosters that need to be mixed with the water you use for the germination process of your seeds.

The Best Cannabis Nutrients Per Growing Phase

Once the seeds have germinated and the seedlings are starting to grow, the growth stage has arrived. We also call this phase the vegetative (‘veg) stage. During this time, the plant needs very specific nutrition because of the explosive growth and the leaves and roots start to grow. You can compare this phase with a teenager eating everything that’s in the fridge. You don’t really want to feed the kid fast food, the thing it needs is healthy food and vitamins.

cannabis nutrition npk

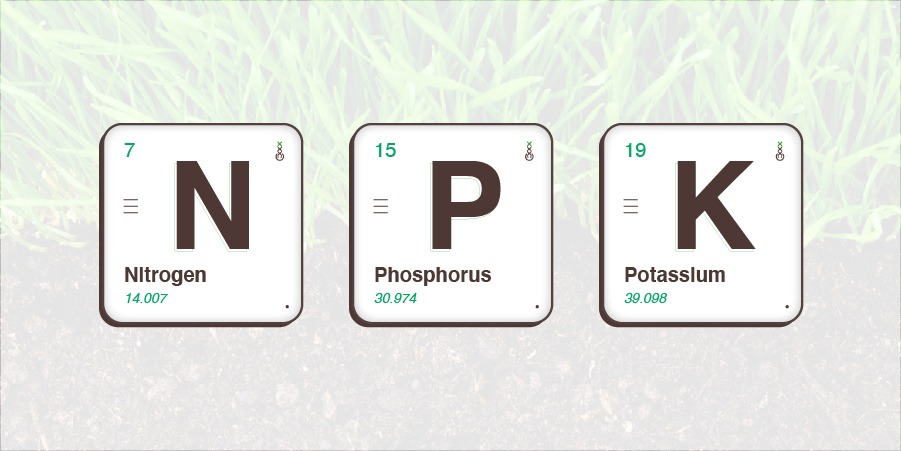
There are some essential ‘meta nutes’ the plant needs during the vegetative stage: nitrogen, phosphorus and potassium (‘N-P-K’). The one that’s especially important is nitrogen (N), the plant needs this for the chlorophyll in the chloroplasts. Phosphorus is also a very critical substance though. Besides this, calcium (Ca) and magnesium (Mg) are useful booster nutes that you can add to the right cannabis nutrients to support the growth.

You can find many products of different brands that offer reliable cannabis nutrition for the growth stage, so it’s important to look around for yourself. Add a drop to the water that you feed your plants and you are ensured of the right dose of organic booster nutrients. Another great example of specific cannabis nutrition to support the growth are biocatalysts. These substances release extra nutrients and protect the plant from diseases, just like a rich soil life would do this in a natural environment.

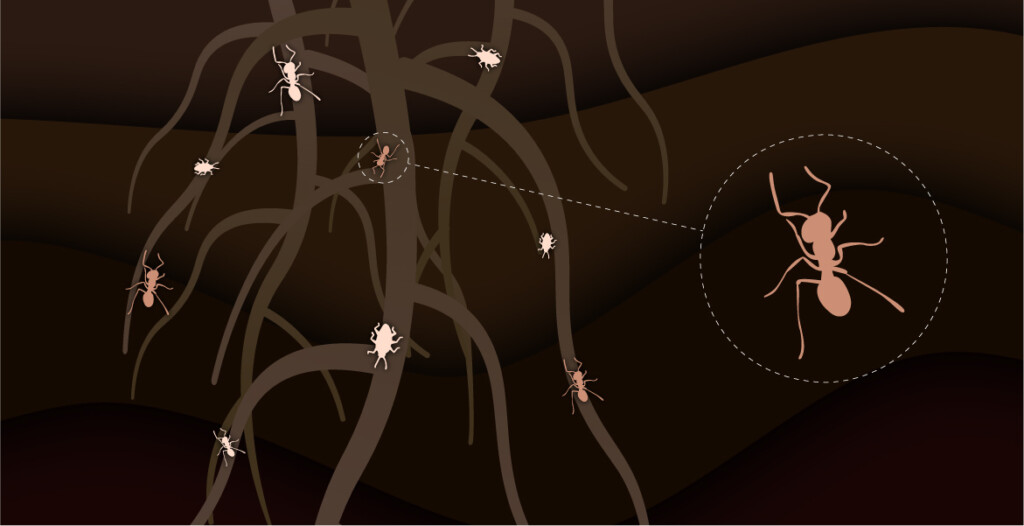
cannabis bodemleven mycorrhyza

During this phase it’s also important to think about controlling the acids or add a root stimulator, which improves the nutrient absorption of the root. There are many products who can help you achieve this.

Important Nutrients During The Flowering Stage

During the flowering stage, the cannabis plant changes its strategy: the goal now is not to grow and increase leaf surface. From now on every drop of energy goes to the flower buds: exactly the stuff that makes a grower very happy after harvesting! The buds of a weed plant need other nutrients though. During the flowering phase the plant needs less nitrogen, but the demand for phosphorus and potassium is growing. This way your buds can’t just get bigger and more compact, the flowers will also start to shimmer from all the trichomes filled with THC and aromatic terpenes for maximal effect and a great taste.

trichomes

Many different blooming enhancers can help you out here, like a completely organic PK booster. Of course you can also try to use your own homemade recipes or regular products from the garden centre around the corner: you wouldn’t be the first to try these! However, it’s good to know that there plenty of specialist cannabis nutrition products to support every stage of the cannabis plant, whether she grows inside or outside!

Flushing Before Harvest

All these extra nutrients can really boost your cannabis grow, result in strong plants and a big harvest. Even though your plant needed this nutrition until this point, it´s important you make sure there won’t be too many nutrients left – especially in the buds – when you start harvesting. You can do this by flushing your grow when the blooming stage comes to an end.

Just feed the plants water, without any additions or nutrients, so your plant gets detoxed and all the excess substances flush away. Even if you only gave your plant 100% organic nutrition, it can help you to end up with a clean batch and nicely cured buds at the end of the grow.

water nutrients cannabis

Organic Cannabis Nutrition For Every Stage

You probably have noticed that every stage of the plant’s life cycle requires the appropriate nutrition. Still, it’s up to the grower himself to make decisions about what to feed your plants: in the end this is the charm of your own grow, indoors or outdoors. Whatever you want, the possibilities to only use organic nutrients are endless and many growers are taking this path very deliberately.

In the end it all comes down to this: so many growers, so many wishes. Every grower has its own desires when it comes to growing cannabis. That’s why it’s great to see there is an abundance of nutrition products to choose from. Whether you like to raise your plants with homemade nettle tea, your own secret compost mixture or you order a big box with pots, drops and tablets, it’s all up to you. Besides the nutrients you use, we probably don’t need to remind you that even a truckload of pills won’t get you a great result if you don’t start the grow with the best cannabis genetics!

Keep in mind the there are many ways to parent your beloved cannabis seeds, whether you go for fully organic indoor, completely natural outdoor or ultramodern hydro!